Friday, December 28, 2012

End of the Year Ramblings

Well, I knew it had been a long time since I've posted here but I have to admit I was a bit shocked when I saw I had only posted 4 times this year! It's that time of year to begin thinking about next year and what focus, if any, this blog should have. I loved doing the shot a day a few years ago, but I just can't seem to pick up that pace again. I did it for awhile on a photo club page on Facebook. That's easier because I know not many people will see it and I put much less effort into the shot and post processing. But my interest in that has waned as well with only 2 posts this month. If I'm only going to post here 4 times a year I don't think it's really worth keep the blog going. So what to do????

Here are some random thoughts off the top of my head:
1.  I just posted a macro tip post. So, I could occasionally post tips on other topics and look for feedback. (I think I'll run out of ideas quickly.)
2.  Look on flickr and 500px for inspiration and try new things and write about it here.
3.  I want to start a photo business shooting babies and kids. My goal is to be making a little money at it by the time I retire in 4 years. So, I could write about the process here.
4.  Make an attempt at the photo a day or maybe select a favorite photo from the week to post, yep that seems managable.
5. I'm open to suggestions!!

I know one thing for sure, if I'm going to write more I need to change this template. I love the black background for pictures but I find it very difficult to read white on black.

You may be wondering if I'm still taking pictures since I'm not posting here. The answer is yes. I think I'm posting mostly on Facebook. Mainly because I have trouble getting my flickr posts to show up in Facebook. I haven't posted as much on flickr and I have not been connecting with anyone there and that I truly miss.

A few photo highlights of the year-
Photo Club-a great group of creative  people, we've done some awesome shoots this year and we participated in the Help Portrait Project.
Flash-I just got my first external flash along with a softbox and umbrella. Lots to learn and I'm excited!
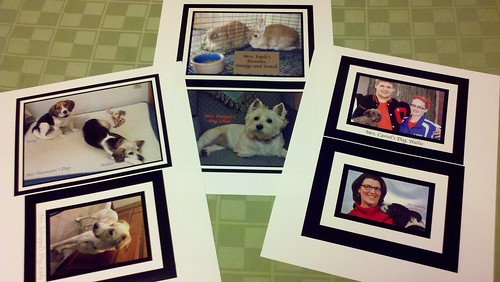
Engagement Shoot-our son got engaged so my husband, daughter and I all took engagement shots for them! They've never told me which pictures were their favorite so I'm thinking tomorrow I'll just select my favorites and post them for some feedback.
Snowflake-A few days ago I got a shot of a snowflake that I actually like, the one at the top of the post. I know it could be better but I was ready to do a happy dance when I first saw it. Maybe I shouldn't admit this but it's taken me 3 years to get a shot of a snowflake that I like.


Here are my 2013 Photo Goals:
1.  Post to Flickr and start commenting and reconnecting with others there.
2.  Get back to blogging here, about something, at least twice a month but preferably weekly.
3.  Start my photo business using baby steps, I need to begin but not hurry.
4.  Only post family related pics to Facebook.
5.   One of my macro tips was to look for inspiration and try to duplicate it. I need to follow that advice.
6. Go to Pinterest and read those articles I have pinned!

What are your photo highlights from the past year? What are your photo goals? Please share I'd love to hear from you.

Happy New Year!


Macro Tips

Earlier this week, Kevin Jarrett sent me a message to let me know that he was so inspired by my macro pictures that he bought a macro lens!  Now he's looking for some advice on macro shooting. First of all this was a bit of a wow moment for me, enough so that it inspired me to write a blog post! Shocking, right? Secondly, I thought, tips? What do I know about macro photography? Well, I've been doing macro for about 3 years so I must know something.

So, here are my tips for macro photography:


  1. Experiment-set up a shot and take multiple shots using different apertures. Remember, the smaller the aperture (lager number) the greater your depth of field so more will be in focus.
  2. Understanding the connection between shutter speed, aperture, and ISO will help your shots. This past summer I finally started shooting in manual mode most of the time and that step really helped me understand this whole triangle much more clearly.
  3. Practice on ordinary objects around the house. One of my favorite shots is of a wire whisk from the kitchen. Besides playing with my macro lens I was also experimenting with lights for that shot.
  4. Edit- just so you know I edit my pictures in Photoshop. My snowflake shots are also heavily cropped.
  5. Don't rush to buy more gear to get even closer shots. I bought extension tubes and have played with them a bit but so far haven't found them worth the money. But....I'll keep playing.
  6. Go to Flickr and search macro. Find shots you like and look at the exif data. Find shots that you can try and recreate using the same settings.
  7. Use a tripod when possible.
  8. When using a slow shutter speed be sure to use the timer on your camera so you don't have any camera movement.
  9. Learn from the mistakes. Analyze a shot that is not what you wanted. Try to figure out what you could do to improve it next time.
  10. Be patient and don't give up. It took me 3 years to get a snowflake shot that I really like even though I know I still want to do better.

Well, those tips flowed out much easier than I was expecting. So, what do you think? Will this be helpful? I hope so. Let me know if you have any questions. I'll try to help.

Hey, other macro users out there, what tips do you have? I'd love to hear them. I'm always trying to improve my shot.

Thursday, February 23, 2012

Smoke


Smoke, originally uploaded by NedraI.
After reading this article; www.photopoly.net/smoke-photography-made -easy/ I tried these smoke shots. I don't like incense so I kept lighting and blowing out a small votive candle. My first attempts didn't turn out well so I reread the article and realized my aperture wasn't set correctly so I tried a few more shots and was happy with these results. Learning how to add the gradient fill layer in Photoshop was a new skill for me. It felt great to learn something new today!                
This shot is cropped but no special Photoshop effects:
This one looks like a liquid being poured:


Tuesday, February 7, 2012

Playing with Fire


xDSC_0134, originally uploaded by NedraI.

A member of our photo club set up this awesome demonstration for the rest of us to photograph. Considering I forgot my tripod my pictures turned out ok. I look forward to trying it out again sometime.

Tuesday, January 17, 2012

First Joint Photo Shoot-What I learned

My husband and I were asked to shoot some family portraits at the family's house. This was our first joint venture. My husband has more experience with taking photos of people and using lights. I've always taken photos of nature. So, this was a great learning experience for me. I thought I'd take a few moments to reflect on what I learned.

First of all it's great to walk into a home and have the mom say she has some ideas on what she'd like done. We used four different locations in the house. I ended up taking the photos. My husband was a great coach. He made sure I had the camera set correctly and we went through test shots together to make any necessary adjustments. We used a manual setting: 400 ISO, 125 @ f11 or 16 depending on the room. We also set the light balance for flash. We have an old set of studio lights that my husband picked up at a garage sale many years ago. They worked great but we do want to get new umbrellas for them.

As I took photos my husband gave me reminders not to focus in too close, something I typically do with my nature shots. I need to remember to leave room so the shot can be cropped to 8x10.

I always shoot in RAW but my husband said since we knew the settings were correct I didn't need to make any adjustments. I learned something new about Camera Raw today. I learned I can set the crop for 8x10 and then save the picture as a JPG. I've always made my adjustments, then opened the pictures in Photoshop, made more adjustments if necessary, often it's not for what I'm doing, and then saved the picture as a JPG. So, that was a time saving tip worth learning. 

What I need to do:

  • Continue to work on being more outgoing-I knew an outlet was going to be in the picture. I should have said something and made some slight adjustments and gotten rid of it.
  • Watch my camera angle. Way too many of my photos were tilted.
  • Look at other portrait photos and get ideas for shots. Not everyone is going to know what they want. 
  • Don't take so many photos of the same pose. I ended up with 288 photos. I think I cropped and saved about 240 pictures. That might be too many choices for the family! 
The family was cooperative and easy to work with which made this job very enjoyable. I think our first joint venture went well. I hope my husband thinks so as well. 


Monday, January 2, 2012

January 2


January 2, originally uploaded by NedraI.

Today I learned how to add a frame to a picture in Photoshop using an uploaded action. I don't know why they turned out different sizes. It took awhile but I also remembered how to to put two pictures on one page. These pictures are for a bulletin board titled Teacher's Pet. I may reprint them larger tomorrow night. I'm afraid they'll look lost on the board. I thought I'd get more pictures.